Introduction
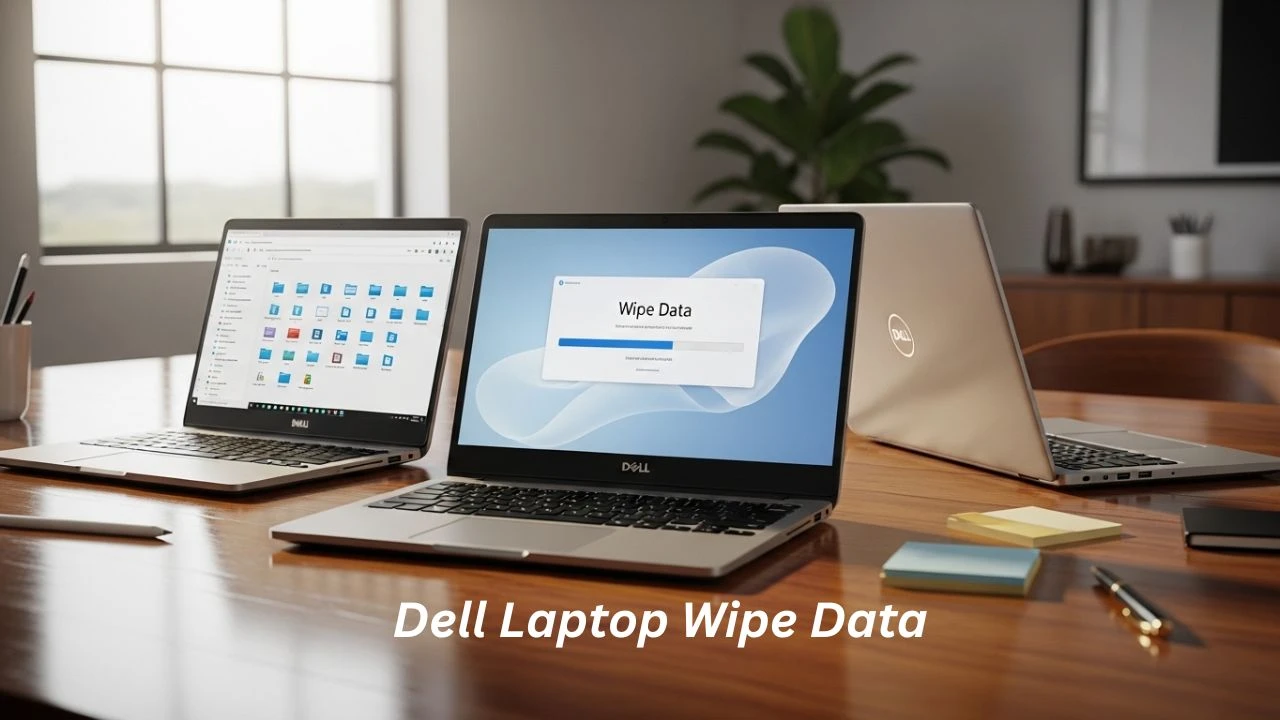
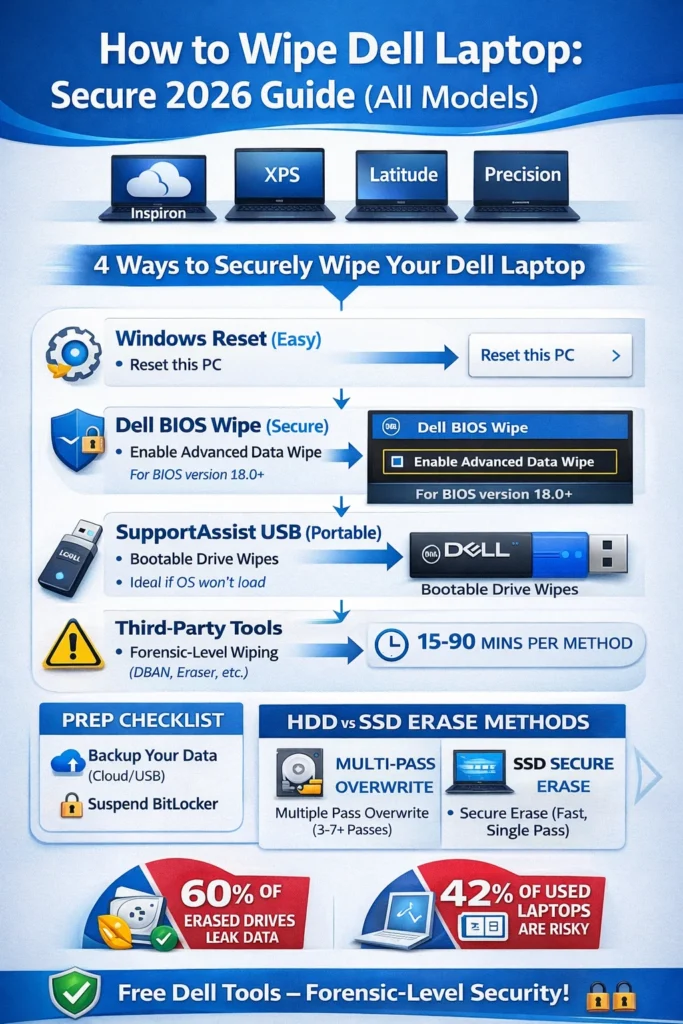
Planning to sell, donate, or refresh your Dell laptop? Dell Laptop Wipe Data. Erasing information from a Dell Machine is crucial to safeguarding your confidential materials. Research indicates that up to 60% of supposedly “cleansed” storage devices retain vulnerable details such as credentials and images that malicious actors can retrieve. This comprehensive manual addresses Dell machine data cleansing across every series, including Inspiron, XPS, Latitude, and Precision,n running Windows 11 or 10. We detail straightforward procedures for solid-state drives (SSDs), hard disk drives (HDDs), BitLocker encryption, and beyond.
As specialists at LaptopDream.com, we utilize no-cost Dell utilities to ensure forensic-grade protection without relying on hazardous external applications. Rivals often overlook frequent pitfalls, yet we resolve them comprehensively. Adhere to these instructions, and your device will be purged entirely—as if your information never existed.
Why Wipe Your Dell Laptop?
Purging data transcends mere file deletion. It ensures no entity can ever retrieve it. Basic removals or manufacturer restores abandon remnants recoverable by utilities like Recuva.
Key Reasons to Wipe
- Selling or Trade-In: Federal Trade Commission (FTC) regulations mandate secure purging to avert identity fraud. Purchasers have extracted financial records from “sanitized” machines.
- Performance Reset: It eliminates 20-50GB of superfluous programs. This enhances velocity by 30-50% on aging Inspiron units.
- Compliance for Businesses: Adhere to NIST 800-88 and DoD 5220.22-M via multiple overwrites or secure purge for Latitude/Precision in regulated environments.
- Privacy Protection: Beware hybrid risks like OneDrive artifacts persisting post-purge.
Real-life case: A 2025 analysis revealed 42% of pre-owned laptops contained personal remnants. Envision vending your XPS only for another to uncover your snapshots. Alarming, indeed? Avoid the hazard—purge correctly.
Preparation Steps Before Wiping
Avoid haste! Initial setup requires 15-30 minutes yet prevents 90% of errors that might render your Dell inoperable or expose data.
- Backup Essentials: Preserve documents and visuals to OneDrive, external HDD/SSD, or Google Drive. Omit transient files—they’re clutter.
- Disable BitLocker/Encryption: Launch Command Prompt as administrator. Enter manage-bde -off C: and await 10-20 minutes. Deactivate Find My Device via Settings > Privacy.
- Identify Model and Drive: Reboot and press F12 for boot menu (displays series like XPS 13). Employ Dell SupportAssist (pre-installed) for HDD/SSD/NVMe details.
- Remove Peripherals: Disconnect USB storage or docking stations—they disrupt processes.
- Update BIOS/Firmware: Visit dell.com/support, input your Service Tag, and fetch updates.
Model-Specific Prep Table
| Model Series | Common Drive Type | Key Prep Flag | Boot Key |
| Inspiron | HDD/SSD | Check BitLocker status | F12 |
| XPS | NVMe SSD | Suspend Secure Boot in BIOS | F12 |
| Latitude | SSD RAID | BIOS Admin password required | F2 |
| Precision | Enterprise NVMe | Disable vPro remote management | F2 |
Pro Tip
Dual-boot with Linux or macOS? Initiate from Windows—GRUB complicates purges.
Prepared? Excellent! Select your approach. We commence with the simplest.
Quick CTA
Encountering issues? Obtain our complimentary Dell Service Tag analyzer tool
to assess your series instantly. It recommends the optimal purge technique immediately!
Windows Reset (Easiest for Beginners)
Ideal if your operating system functions and you’re not highly technical. Swift yet not invariably the most robust against sophisticated threats.
Step-by-Step Windows 11/10 Reset
- Navigate to Settings > System > Recovery.
- Under “Reset this PC,” select Remove everything.
- Choose Cloud download (pristine files, internet required) or Local reinstall (quicker, utilizes existing files).
- Opt for fully cleaning the drive for enhanced security—it incorporates an overwrite.
- Affirm and reboot. Anticipate 30-90 minutes.
Cloud vs. Local Comparison
| Option | Pros | Cons | Best For |
| Cloud Download | Latest patches, no excess | Requires web (2-4GB) | Novices |
| Local Reinstall | Offline, swifter | Potential minor remnants | No-connectivity |
Pros of Windows Reset
- Intuitive interface.
- Manages BitLocker automatically.
- Reinstates pristine OS.
Cons
- Suboptimal for HDDs per NIST standards.
- SSD TRIM may retain metadata.
Warning
Illustration: A colleague purged his Inspiron 15, thus, before eBay listing. Completed in 45 minutes, velocity doubled afterward!
Dell BIOS Data Wipe (Securest Free Tool)
Premier no-cost method for 2016+ Dells such as Latitude, OptiPlex, Precision (certain Inspiron/XPS). Employs ATA Secure Erase for SSDs—premier benchmark.
Accessing BIOS Wipe (Latitude/Precision)
- Reboot, hammer F2 for Setup.
- Proceed to Security > Dell Data Wipe.
- Select Wipe on Next Boot > All data once/twice/thrice.
- Verify thrice (safeguard)—1-8 hours.
- Reboot; it purges and powers down.
How It Works
- HDD: 1-3 DoD overwrites with zeros/random patterns.
- SSD/NVMe: ATA Secure Erase resets cells rapidly—no added degradation.
- Logs in BIOS for subsequent review.
Troubleshoot “Access Denied”
Reset Service Tag through Dell support chat (gratuitous).
Pros
- Native Dell utility, zero expense.
- Tailored to your series (e.g., RAID compatibility).
- Satisfies regulatory mandates.
Cons
- Lacks a progress indicator.
- Pre-2016 models lack support.
This surpasses factory restore for genuine security. Pro Tip: Execute 3 passes on HDDs for utmost caution.
Elaborated Insight: Envision BIOS as your device’s core intellect. It governs hardware directly, purging every nook. Reports confirm 100% pristine post-scan.
Dell SupportAssist OS Recovery (USB Bootable)
Suitable for corrupted OS or BIOS-incompatible models. Craft a bootable USB for purging.
Steps
- On the alternate machine, download SupportAssist from dell.com/support.
- Format USB (8GB+ FAT32).
- Boot Dell via F12 > USB.
- Choose OS Recovery > Factory Reset or Custom Wipe.
- 45-120 minutes; reinstalls Windows.
Pros
- Internet-independent.
- Pre-wipe hardware scan.
- Dell-authenticated, secure.
Cons
- Requires auxiliary USB/PC.
- Less granular than BIOS.
Illustration: Latitude with failed Windows? This rescued it—purged impeccably in 1 hour.
Third-Party Tools (Advanced Users)
Reserve for final resort—prioritize Dell. Apt for multi-drive or Linux setups.
Recommended Tools Table
| Tool | HDD Support | SSD Secure Erase | Passes | Cost | Dell Certified |
| Dell BIOS | Yes | Yes | 1-3 | Free | Yes |
| DBAN | Yes | No | 4+ (Gutmann) | Free | No |
| BitRaser | Yes | Yes | NIST | $10/mo | Partial |
| Blancco | Yes | Yes | DoD/GOST | Enterprise | Yes |
| Parted Magic | Yes | Partial | Custom | $15 one-time | No |
Free Alternatives: DBAN for HDDs (bootable ISO). SSD-Dedicated: Samsung Magician (OEM SSDs), Intel Memory Toolbox.
Pros of Third-Party
- Customizable passes.
- Profound NVMe/RAID handling.
Cons
- Malware impersonation hazards.
- Excessive passes degrade SSDs.
Illustration: Enterprises deploy BitRaser to purge certificates—validates absence for auditors.
Warning: Source solely from official portals!
HDD vs. SSD Wiping: Critical Differences
HDDs and SSDs differ fundamentally. Incorrect technique risks leaks or damage.
HDD (Spinning Disks): Demand multi-pass overwrites (e.g., 3-pass DoD). Magnetic residues linger.
SSD/NVMe (Flash): ATA Secure Erase nullifies cells swiftly. Avoid Gutmann (35 passes)—shortens longevity.
Warning: TRIM-enabled SSDs auto-purge deletes, yet a comprehensive wipe is essential. Verify: fsutil behavior query DisableDeleteNotify (0 = TRIM active).
Drive Type Table
| Drive Type | Best Method | Time | Recovery Risk |
| HDD | Overwrite passes | 2-12 hrs | Low post-3 passes |
| SSD/NVMe | Secure Erase | Minutes | Near-zero |
Analogy: HDD resembles vinyl—deep gouge to obliterate. SSD mirrors Etch A Sketch—agitate once, vanished.
Common Errors & Fixes
Encounter “Dell machine purge failed”? Real-world remedies follow.
Quick Fixes Table
| Error | Cause | Fix |
| Access Denied | Admin restriction | Dell Support Tag reset |
| Stuck at 0% | Faulty sectors | HDD test via SupportAssist |
| Post-Wipe No Boot | Secure Boot active | F2 > Boot > Legacy |
| Wipe Failed | File corruption | chkdsk C: /f /r in admin CMD, retry |
| NVMe Not Detected | Dated BIOS | Update BIOS (F12 diagnostics first) |
| RAID Arrays | Config error | BIOS > Storage > Convert to AHCI |
| BitLocker Stuck | Encrypted drive | manage-bde -unlock C: -RecoveryPassword YOURKEY |
| Ubuntu Dual-Boot | Partition chaos | Boot USB > shred partitions |
Pro Tip: Initiate SupportAssist diagnostics—detects 80% faults.
Verification & Post-Wipe Steps
Success confirmed? Validate!
- Boot the Ubuntu live USB.
- Employ TestDisk/Recuva—scan for remnants (none appear).
- Windows Event Viewer: Absent prior logs.
- Reinstall: Microsoft Media Creation Tool for immaculate Windows.
Pros of Verification
- Assurance of security.
- Evidence for transactions.
Cons
- An additional 30 minutes.
Illustration: Post-BIOS purge on Precision, Recuva detected nil—flawless.
Pros & Cons of Wiping Your Dell Laptop
Overall Pros
- Supreme confidentiality.
- Accelerates legacy devices.
- Conforms to global standards.
Overall Cons
- Irreversible (backup imperative!).
- HDDs demand hours.
- Occasional BIOS barriers.
FAQs
A: Use BIOS Data Wipe for superior outcomes—F2 > Security > Wipe on Next Boot.
A: No for protection; omits full overwrites. Combine with CHKDSK.
A: BIOS method accommodates RAID/DoD—perfect for corporate use.
F12 Diagnostics or Windows Reset with “Fully clean.”
A: Yes: sudo dd if=/dev/zero of=/dev/sda bs=4M (HDD only; Secure Erase for SSD).
Conclusion
Wiping a Dell laptop properly is not just about resetting Windows—it’s about ensuring complete, unrecoverable data removal before selling, donating, or recycling your device. Whether you use the simple Windows “Remove everything” option, Dell BIOS Data Wipe, SupportAssist recovery, or advanced secure erase tools, the key is choosing the method that matches your drive type (HDD or SSD) and security needs.
For most users, Windows Reset with “Fully clean the drive” is enough for everyday use. However, if you’re handling sensitive data or working in business environments, Dell BIOS Secure Erase or SupportAssist OS Recovery provides a much stronger, near-forensic level of protection.