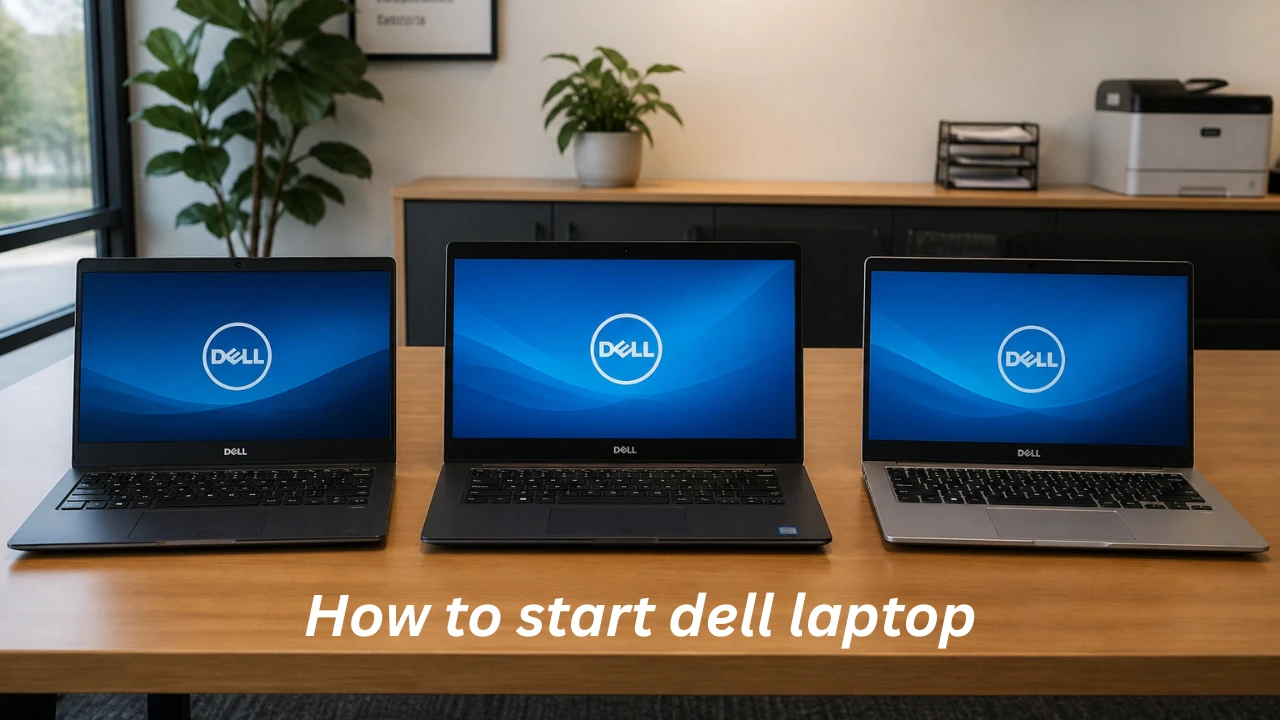
How to start a Dell laptop
Activating a Dell notebook ought to feel straightforward. You simply locate the power switch and observe the Dell emblem appear. How to start dell laptop. Yet numerous individuals encounter obstacles—particularly with a fresh device directly from packaging or one left idle for an extended period. They question the position of the activation key, the proper way to energize USB-C variants, or the reason no activity occurs upon attempting to activate it.
This manual assists all users. Whether you own a sleek XPS slimbook, a basic Inspiron suited for education or occupation, a durable Latitude designed for corporate use, an entertaining G-Series for gaming, or a robust Alienware machine, you will master every procedure in detail.
Preparing to Activate Your Dell Notebook
Avoid hastening to engage the activation switch. A large number of “fails to activate” complications arise because the energy cell is utterly depleted or the energizer encounters difficulties.
Energize Correctly at the Outset
Connect the AC adaptor into the appropriate socket. Previous or economical Dell variants frequently employ a circular barrel link. Contemporary XPS, Inspiron 14/16 Plus, and Latitude versions utilize USB-C or Thunderbolt connections.
Permit a totally exhausted energy cell to replenish for 30–60 minutes. Numerous 2026 Dell notebooks incorporate ExpressCharge capability that rapidly boosts battery life, yet a wholly empty battery might still demand additional duration before the notebook responds.
Examine Components and Protection Inspections
- Inspect the energizing cord and adaptor for any harm, worn wires, or curved connectors.
- Consistently employ a Dell-endorsed or matching energizer possessing the proper power rating. Incorrect energizers might prevent the notebook from activating or replenish extremely gradually.
- Detach all supplementary items: USB sticks, docking units, external displays, pointers, or earphones. These accessories might obstruct the activation sequence.
- Fully extend the cover. Most current Dells require the cover to be opened to activate, though certain models permit enabling “Activation on Cover Open” within BIOS.
Advice for Locating the Activation Switch
Dell activation switches can blend seamlessly for a tidy appearance. They typically consist of a compact circle or rectangle featuring a power symbol.
Frequent positions in 2026 variants:
- Inspiron and XPS: Upper-right section above the keyboard or integrated among the function keys.
- Latitude/Precision: Within the keyboard zone, frequently upper-right, close to the Delete key.
- G-Series and Alienware: Simpler to notice, occasionally accompanied by attractive RGB illumination.
- Previous or affordable variants: Sometimes positioned on the edge or adjacent to the hinge.
Unable to locate it? Invert the notebook, record the variant number or Service Tag from the underside label, then visit Dell Support and search for your precise handbook.
Power button locations vary across series, but generally sit above the keyboard in the top-right area or are integrated subtly into the design for premium models like XPS. On the gaming-oriented G-Series, it often appears more prominent with lighting effects. Latitude business models place it near the Delete key for quick access. Always confirm with your specific model’s manual via the Service Tag for accuracy.
How to Activate / Boot a Dell Notebook (Fundamental Procedures)
Following preparation, activating the notebook becomes uncomplicated:
- Verify the notebook connects to power or holds sufficient energy.
- Fully extend the cover.
- Identify the activation switch and depress it solidly once (refrain from sustaining pressure initially).
- Pay attention to the cooling fans and look for the Dell emblem. Activation duration typically ranges from 10 to 60 seconds with a swift SSD.
- Should it represent a brand-new or restored notebook, the Windows Out-of-Box Experience (OOBE) commences.
On Windows 11 (standard for 2026 Dells), you will encounter displays requesting your territory, keyboard arrangement, wireless network linkage, Microsoft account login (or local profile on Pro), PIN configuration, and privacy preferences.
Variant-Particular Differences
XPS variants appear exceptionally tidy, rendering the switch feeling smooth. Gaming variants offer a more tactile response and might illuminate. Certain recent notebooks support activation-on-lid, yet the dedicated activation switch remains the most dependable technique.
Should the monitor persist in darkness, cooling fans fail to rotate, or no indicators manifest, proceed immediately to the diagnostic segment.
Initial Configuration Following Activation (Windows OOBE)
Fresh Dell notebooks arrive with Windows 11 pre-loaded. The configuration assistant guides you through uncomplicated stages:
- Select your nation/territory and keyboard arrangement.
- Link to the wireless network (or employ Ethernet for steady linkage).
- Consent to the agreement terms.
- Log in via a Microsoft profile or establish a local profile (simpler on Pro editions).
- Configure a PIN for rapid access.
- Choose confidentiality settings and preferences for speech helpers.
- Allow Windows to install updates and Dell drivers autonomously.
Following the configuration, launch the pre-loaded Dell Get Started application or SupportAssist. It examines enhancements, driver modifications, and component wellness.
Expert Advice: Immediately after configuration, navigate to dell.com/support, input your Service Tag (located under the hood or in the BIOS), and acquire the latest BIOS, chipset, and graphics drivers. Execute Windows Update thoroughly as well. Maintaining all elements current prevents numerous activation complications.
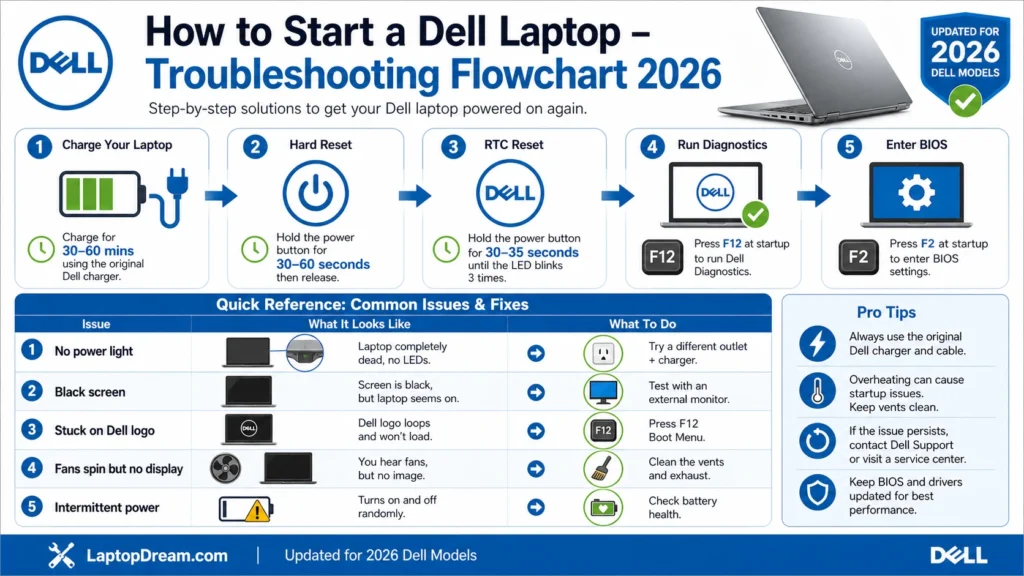
Dell Notebook Fails to Activate? Thorough Diagnostic Approaches
This segment resolves the most frequent inquiries: absent power illumination, cooling fans rotate yet blank monitor, halted on Dell emblem, or sporadic activation troubles. Pursue the procedures sequentially.
Fundamental Energy Verifications
- Experiment with an alternate wall socket and attach the adaptor straight to the wall.
- Inspect the AC adaptor indicator. Absent illumination generally signifies a faulty energizer or cord. Evaluate with another functional Dell adaptor if feasible.
- Depress the activation switch solidly multiple times.
Hard Reset / Energy Cycle (Optimal Initial Remedy)
This procedure eliminates residual electricity and corrects temporary malfunctions:
- Detach the AC adaptor.
- If your variant features a detachable energy cell, extract it. (Most 2020 and newer variants incorporate integrated energy cells.)
- Disconnect all supplementary devices.
- Depress and sustain the activation switch for 30–60 seconds (you might observe indicator flashes).
- Reinsert the energy cell if extracted, reconnect the adaptor, and depress the activation switch once.
Sophisticated Diagnostic Procedures
- Evaluate Without Energy Cell: Connect the adaptor and attempt activation solely. This assists in determining whether the energy cell causes the issue.
- Real-Time Clock (RTC) Reset: On numerous Dell notebooks, attach the AC adaptor, notebook deactivated, depress and sustain the activation switch for 30–35 seconds until the power indicator flashes three times, then release. This restores BIOS configurations without disassembling the notebook. Precision in timing proves essential—too brief or prolonged might fail to function.
- Examine Diagnostic Signals: Monitor for sound codes or blinking indicators (caps lock, num lock, activation switch). Search your variant’s handbook on Dell Support for their significance.
- Execute Dell Pre-Boot Diagnostics: Activate and tap F12 repeatedly for the One-Time Boot Menu. Select Diagnostics or ePSA/SupportAssist examination. Perform the swift test initially, then the comprehensive if required. Record any fault codes.
- Access BIOS Setup: Tap F2 at the Dell emblem. Verify System Information to confirm if the processor, memory, storage, and energy cell registers are. You can restore defaults here.
Frequent Situations and Swift Remedies
Utilize this chart for rapid assistance:
| Issue | Probable Reason | Swift Remedy / Subsequent Action |
| No power light / No response | Faulty adaptor, socket, or cell | Alternate socket + adaptor; RTC reset |
| Activates, but black screen | Graphics, memory, or monitor issue | External monitor test; run LCD BIST |
| Stuck on the Dell logo | Boot sequence, damaged files, BIOS | F12 Boot Menu; F2 BIOS; diagnostics |
| Fans rotate, but no display | Overheating, loose link, GPU | Clean vents; external monitor; diagnostics |
| Intermittent power | Overheating, debris, or a cell | Clean vents; check cell wellness in SupportAssist |
When to Seek Expert Assistance
If a hard reset, RTC reset, and diagnostics prove ineffective, or you encounter particular fault codes, reach out to Dell Support with your Service Tag. Describe the indicators, sounds, and Examinations attempted. Warranty repairs for the motherboard, DC connector, or energy cell frequently come at no cost. For aged notebooks, utilize authorized service facilities.
Sophisticated Capabilities: BIOS, Boot Menu, and Enhancement
Mastering these instruments grants greater authority.
Access BIOS/UEFI Setup: Restart and tap F2 at the Dell emblem. Modify boot sequence, activate/deactivate Secure Boot, adjust energy settings (such as Activation on Lid Open), or restore to defaults. Document your prior configurations before any modifications.
One-Time Boot Menu: Tap F12 during activation for USB boot, diagnostics, or network boot—excellent for restoration or fresh Windows installations.
Safe Mode and Restoration: Should you reach the login display, sustain Shift while selecting Restart to open Advanced Startup Options for software remedies.
Dell Support Instruments: Maintain SupportAssist current. It automatically manages driver modifications, component scans, and energy cell reports.
Averting Subsequent Activation Complications
Beneficial practices conserve time afterward:
- Employ a superior surge protector.
- Sustain air vents tidy and unobstructed—debris provokes overheating and activation failures.
- Modify BIOS, drivers, and Windows consistently through Dell Support or Windows Update.
- Avoid permitting the energy cell to deplete to 0% frequently. Replenish to 50–70% for storage or journeys.
- Close down correctly: Start → Power → Shut Down (refrain from sustaining the activation switch).
- For extended storage, replenish to 50–70% and deactivate entirely.
Protection Advisory: Never compel opening the notebook or creating circuit shorts unless fully knowledgeable. It might damage components or void your warranty. Engage professionals for difficult-to-reach elements.
Pros & Cons of Dell Notebook Activation Experience
Pros:
- Robust integrated diagnostics (F12, SupportAssist) surpass numerous competing brands.
- Lucid official assistance documents and a straightforward Service Tag mechanism.
- Swift SSD activation durations and convenient ExpressCharge on contemporary variants.
- Extensive selections for every category of user.
Cons:
- The activation switch position can seem concealed on certain fashionable variants.
- Non-detachable energy cells render basic hard resets somewhat more challenging.
- Occasional BIOS or driver conflicts following major Windows modifications.
- Assistance pages sometimes require combining information from various entries.
FAQs
A: Uncommon alternatives include enabling “Activation on Lid Open” in BIOS or attempting Ctrl + Esc while connecting the adaptor on certain variants. Otherwise, acquire expert repair for a damaged switch.
A: Typically, due to insufficient initial charge, shipping-mode energy cell safeguard, or static. Perform a hard reset and replenish for at least 30–60 minutes.
A: Examine with an external monitor using Fn + display switch. Execute diagnostics with F12. Common remedies: hard reset, reseat the memory if feasible, or graphics driver complications.
Conclusion
Activating a Dell notebook normally proves as uncomplicated as locating the activation switch and depressing it once after proper energizing. When complications surface—no power illumination, halted on the Dell emblem, or blank monitor—a structured approach incorporating hard reset, RTC reset, and Dell diagnostics resolves most troubles swiftly.
Maintain your system current, cleanse the vents routinely, and utilize official instruments like SupportAssist for seamless operation. Dell notebooks deliver excellent quality and assistance once you grasp their framework.
Bookmark this manual on LaptopDream.com. For precise assistance with your variant, input your Service Tag at dell.com/support. Should fundamental procedures fail to resolve it, Dell warranty assistance or a certified technician represents the safest option.